INTERIOR & EXTERIOR HANDLE KIT INSTALLATION INSTRUCTIONS
TOOL REQUIRED:
- Medium Phillips Screw Driver
HANDLE KIT -Content:
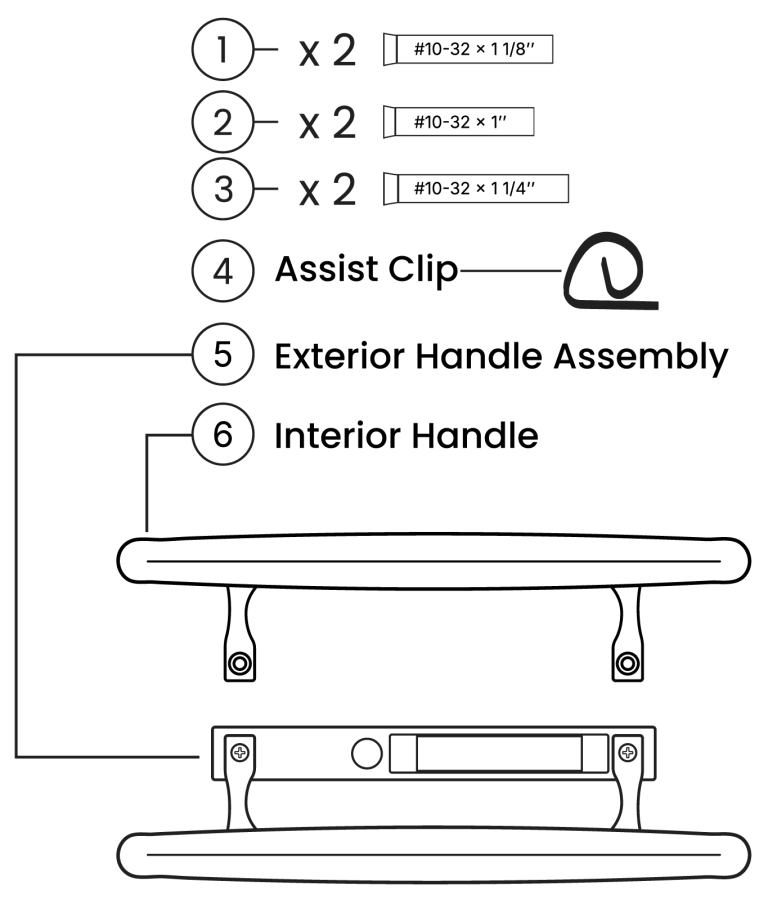
Note, Left Hand assembly shown & illustrated throughout instructions. Instructions are the same for Right Hand assemblies just mirrored.
IMPORTANT NOTES:
DOUBLE CHECK KIT CONTENT!
Be sure to first check contents of kit to be sure you have everything per content list. Should you have any questions or concerns with installation, please feel free to reach out to us for assistance at Info@handleman.net
TROUBLE SHOOTING TIPS
Concern-Assembly Screws won’t begin to tighten.
Remedy – Move the inside or the outside halves up or down to better align for screws to start.
Concern-Handle was ordered for the wrong side (L vs. R)
Remedy – Simply remove the screws from the outside handle assembly and reveres handle to correct position.
For ALL other Concerns reach out to us at info@handleman.net
STEP 1 (Disassembly)
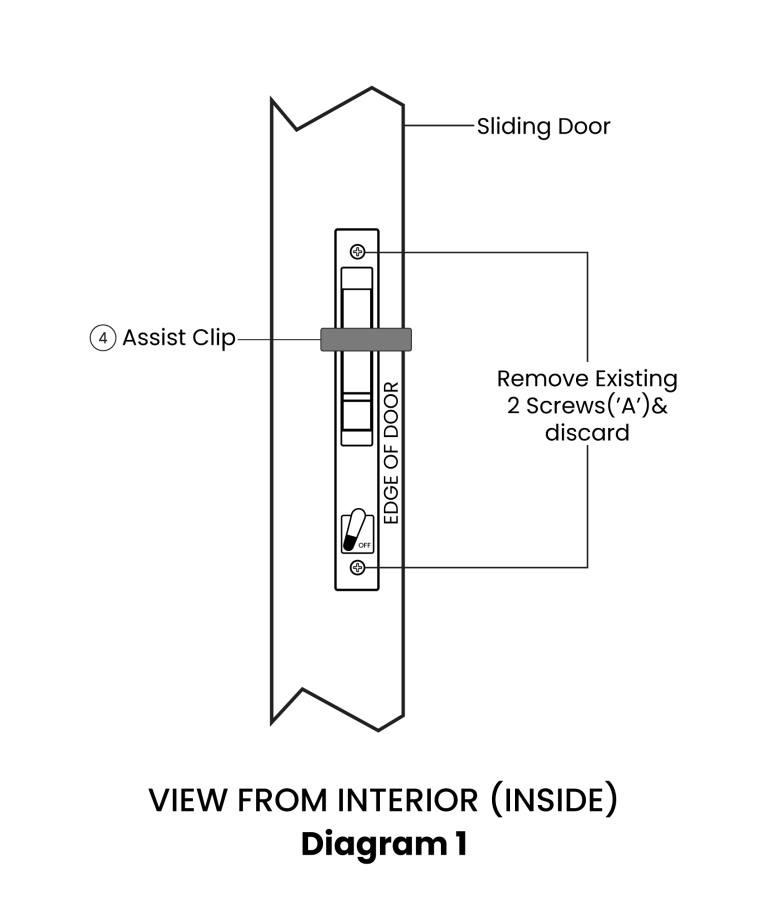
Snap the Assist Clip 4 in place over the edge of the door and over the lock area as shown in Diagram “1”. Remove the 2 existing screws (ref. “A” on Diagram 1) from the inside on the door lock unit. These 2 screws will not be used for reassembly, please discard. The inside portion of the lock remains in the door and is not to be removed during the handle installation.
STEP 2
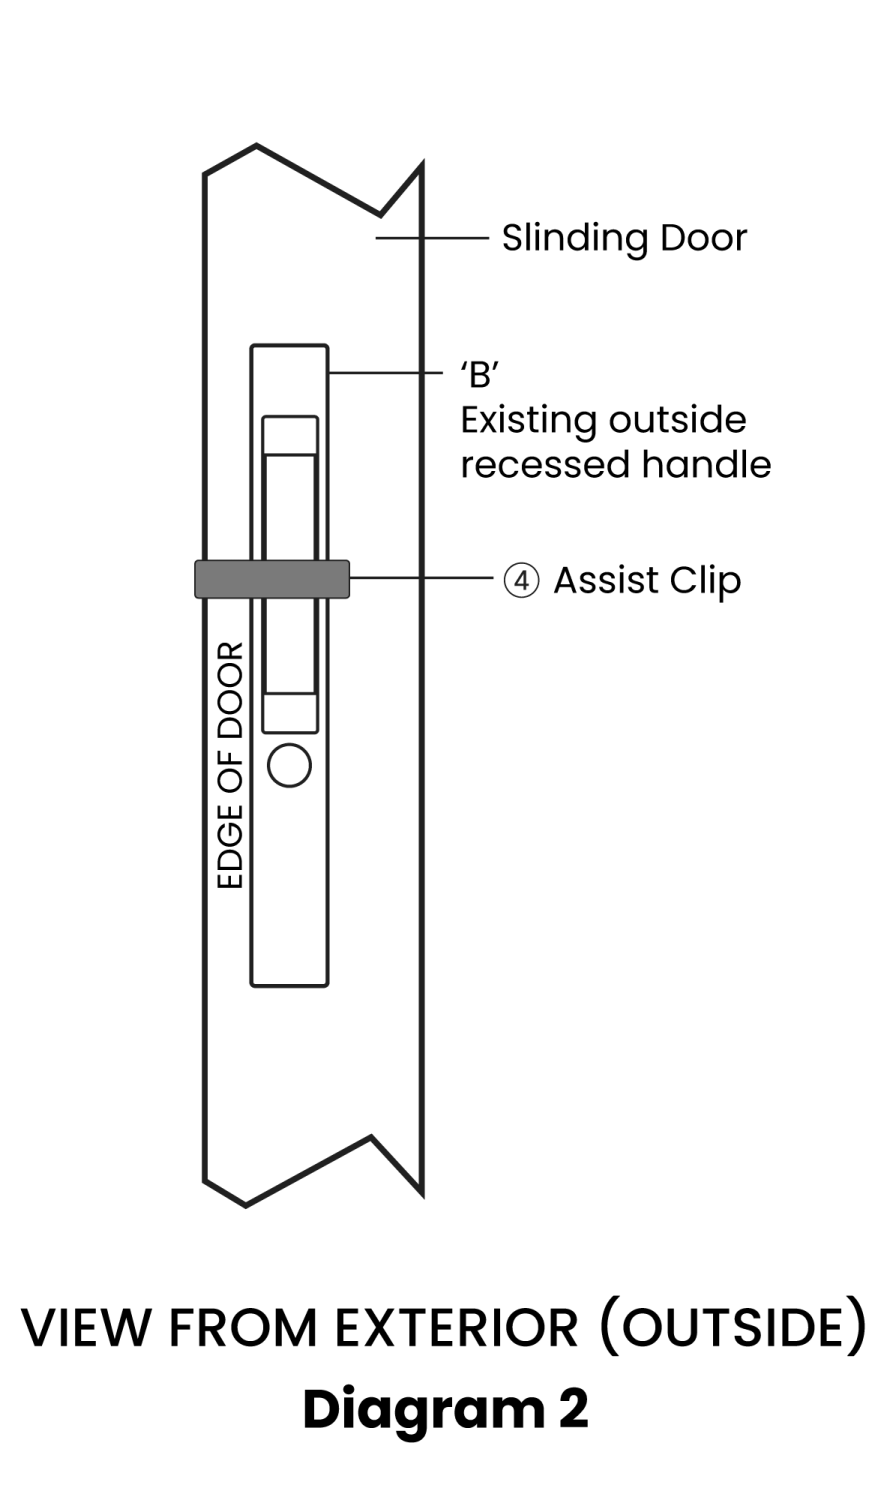
Remove the Assist Clip 4 from the door (only temporarily). Remove the existing outside recessed handle from door (ref. “B” on Diagram 2) and discard as it will NOT be used for the reassembly.
STEP 3
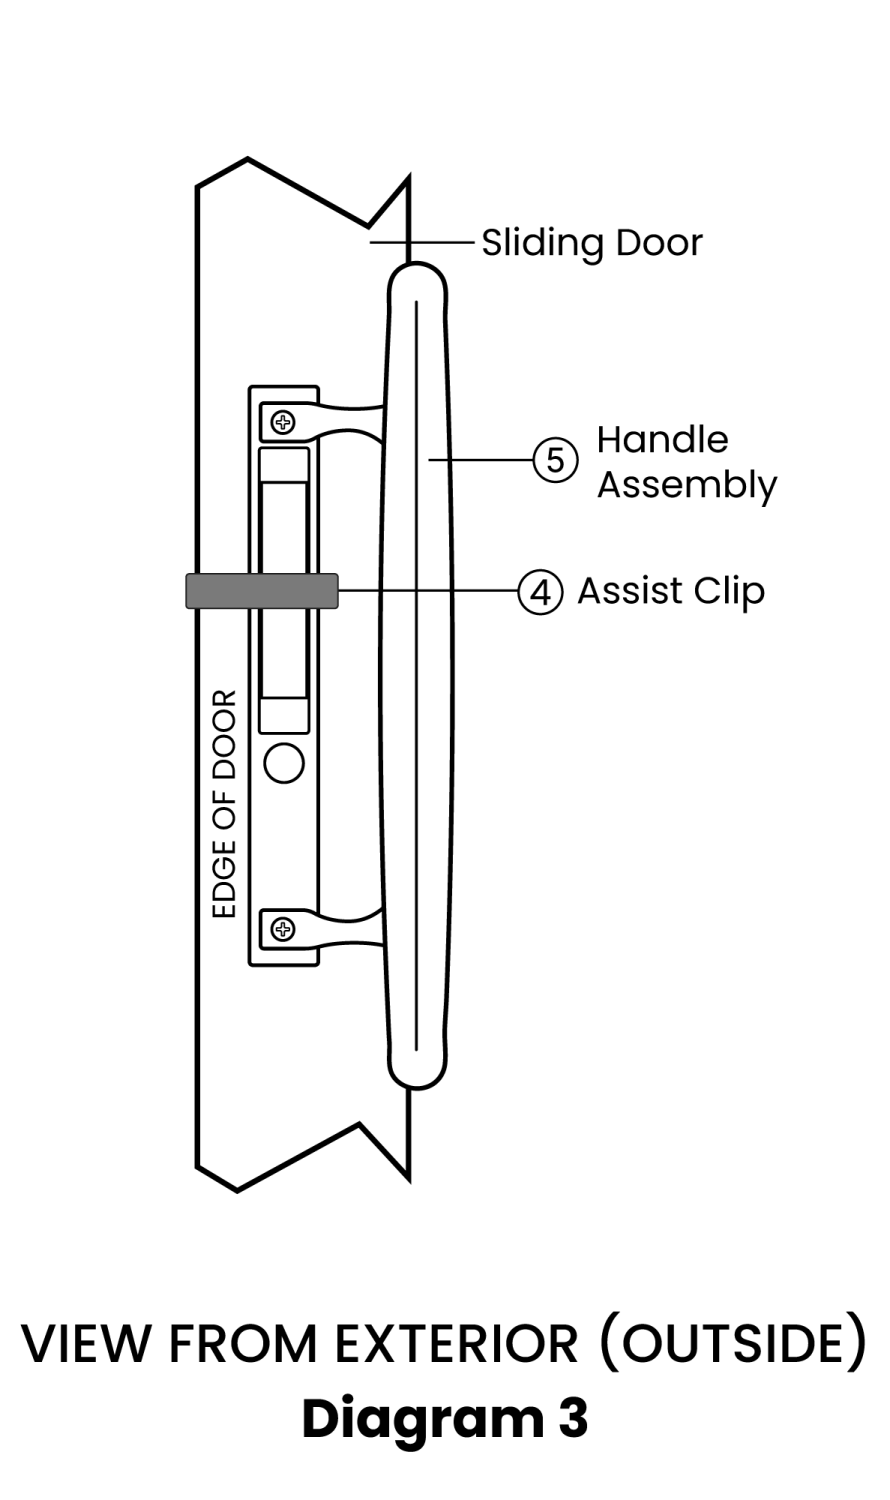
Apply your new Handle-Man Handle Assembly (ref. item 5 in Diagram 3) to the outside of the door and position flush in the door cutout and re-apply Assist Clip 4 back on the door for the
final assembly step.
STEP 4 (Final Assembly)
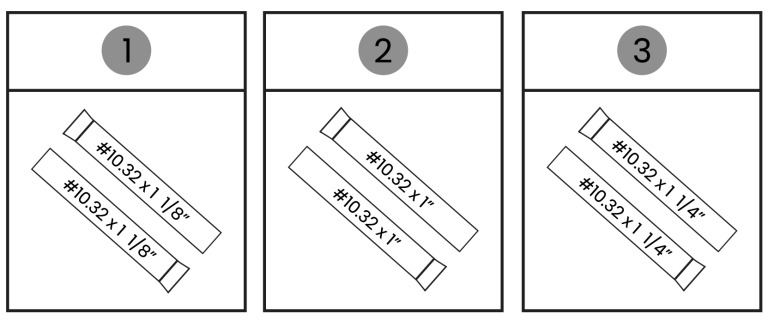
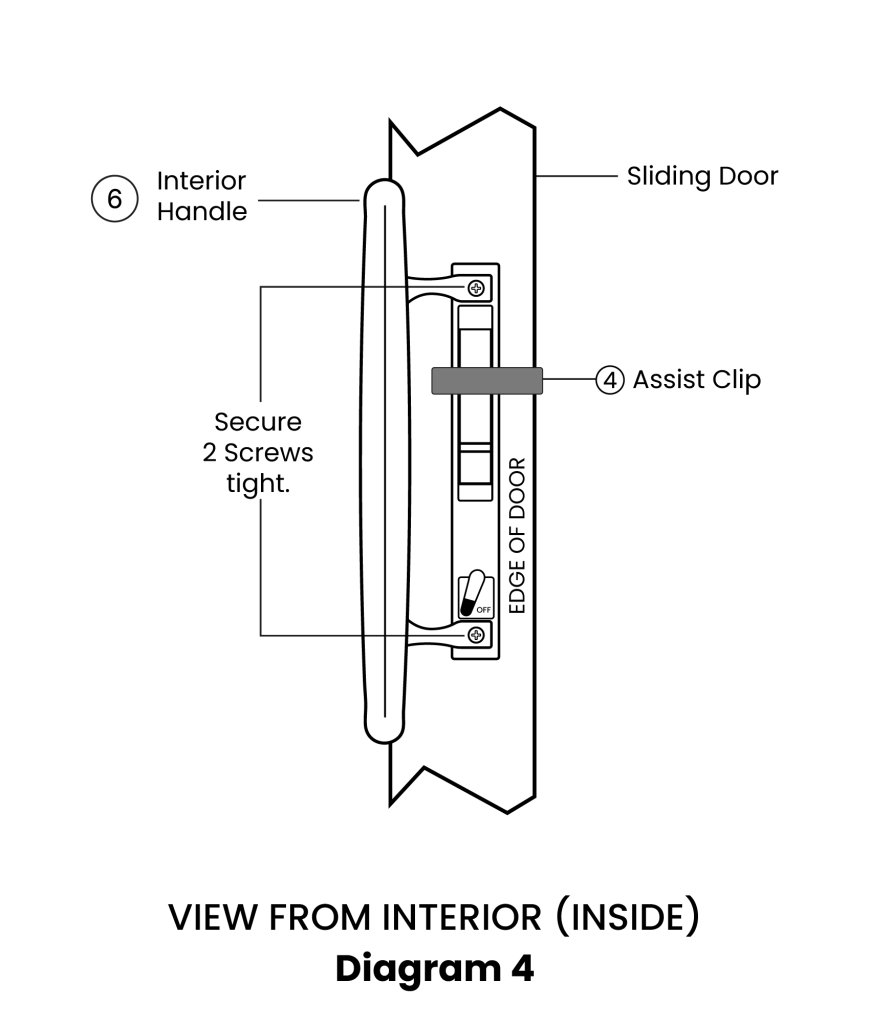
With the Assist Clip 4 holding the inside half of lock and outside handle Assembly 5 in place apply interior handle 6, reference Diagram 4 for positioning, and begin applying mounting screws. Note, various screw lengths are provided in kit due to variations in door thicknesses.
VERT IMPORTANT TO FOLLOW THESE INTSTRUCTIONS!
Start with the #1 medium length (1-1/8″) screws and tighten to secure assembly. IMPORTANT, if screws are tightened, but assembly appears to still feel loose replace the #1 screws with #2 screws the shorter length (1″). BUT if #1 screw seems short with little thread engagement (appearing not long enough) replace with #3 Longer Length (1-1/4″) screws and tighten to secure assembly. Congratulation your new handle assembly is completed. Remove & Discard Assist Clip and enjoy your new handles!
ITS VERY IMPORTANT TO FOLLOW SCREW SELECTION CLOSELY WHEN REASSEMBLING!
